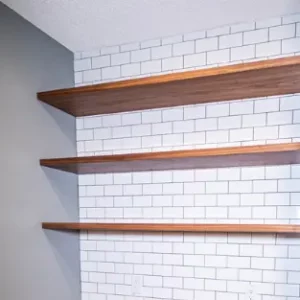
Floating shelves are a great way to add versatility to a pantry. The shelves are key for pots, pans, and serving ware. In addition, the shelves provide extra storage with the space underneath.
It can add extra room for canned goods or boxed items that are not being used as frequently. Read on.
How to Build Floating Pantry Shelves Yourself
A floating shelf is a space-saving way to display some of your favorite things. It is also a great way to use an awkward corner of your kitchen, garage, or basement.

You do not need many tools or skills to make one; follow these steps.
Materials:
1 sheet 1/2″ plywood
A tube of wood glue
1 sheet 3/8″ MDF board (for the edging)
A box of wood screws (2 1/4″
1 sheet 1/4″ MDF board (for the back)
Tools:
Table saw, or circular saw with a plywood blade
Drill press or hand drill with screwdriver bit
Method
Here are some tips on how to build floating shelves.
- Measure and cut your lumber: The first thing you need to do is measure the space available for your floating shelves. Then, use a handsaw or circular saw to cut 2x4s into 16-inch pieces (you’ll need at least six of these). Make sure that all the wood is cut identically to fit together nicely.
- Attach the brackets onto the back of your shelf boards: You will need two brackets per board, so if you are using six boards, you will need 12 brackets total. Place each bracket in the center of one end of each board and secure it with screws or nails (you will probably want to pre-drill these holes). Secure all 6 boards before moving on to step 3 below!
- Attach the brackets onto the wall with screws or nails (depending on what bracket you are using): If you have drywall in your pantry, use drywall anchors instead of screws or nails so that they don’t tear out when you remove the shelves later on). If you have solid walls, use whatever kind of anchor works best for your situation.
Ideas to Decorate Your Floating Pantry Shelves
Floating shelves are a great way to maximize the storage space in your kitchen. They can be used to display your favorite dishes, cookbooks, or even wine bottles.
They’re also super easy to install and don’t require wall repair.Here are some ideas on how to decorate your floating pantry shelves:
1. Hang Wine Bottles on the Wall
Hang wine bottles on the wall above your floating pantry shelves so they’re easy to reach and find when you’re cooking. You can also choose different shapes and sizes of bottles to make your collection more interesting.
2. Display Family Photos
You can create a collage of family photos by hanging them on the wall above your pantry shelves. This is a great way to show off loved ones who live far away or cannot attend an event with you.
3. Use jars for Spices

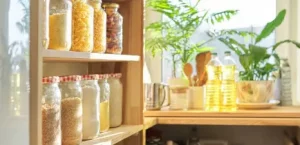
Jars are inexpensive to store spices without taking up too much space on the shelf or in your pantry cabinet below.
You can also use them as decorative accents by filling them with colorful flowers or greenery from outside during the spring and summer months.
It’s unfortunate that the pantry get infested by moths targeting the cereals and spice jars.
4. Use Floating Shelves for Decorations
Floating shelves work great to display some decorations from around your house.
They are also a good place to put up some pictures or family photos, so they can be displayed elegantly that does not take up too much space on the wall.
5. Stained Wood
Staining wood is an easy way to give your shelves a custom look without spending a lot of money on paint or stain. You can use natural or dark colors for an earthy feel or bright colors for a fun pop of color in your kitchen or dining room area.
6. Mirrors
Mirrors can add depth and dimension to any room, and they also help reflect light around the room, making them great for areas that don’t have much natural lighting coming through windows or doors.
They also make a small space appear larger than it is, so if you have limited space in your kitchen, this is worth considering!
7. Add a Little Greenery
The perfect way to add some color and a bit of nature to your kitchen. Put a few plants on your floating shelves, and they’ll look amazing. You can even use fake plants to keep the shelves clean and tidy, and the look will still be just as good.
8. Add Some Fun Knick-Knacks and Decor Pieces
You do not need to be too serious about decorating your pantry shelves; you can also add fun items that make them more interesting.
For example, you can use small glass bottles for storing spices or dried herbs and then fill them with colorful beans or other small objects like beads or buttons (you could even use tiny toys).
You can also use decorative jars for storing things like sugar cubes or tea bags, or even place some decorative letters on top of the shelf to spell out a word or phrase that has a special meaning for you (like ‘Eat’ or ‘Drink’).
9. Add Plants to Your Shelves
Plants can add life and color to any room. They can also be used as decoration for your kitchen shelves. You may want to add decorative plants like succulents or cacti or even herbs that you can use in cooking later or to act as repellents of moths.
10. Fill Your Shelves with Colorful Jars or Bottles
You can use these jars and bottles as storage containers for different items like spices, condiments, portions of pasta, etc.
You can even put them on display by placing them on top of each other so they form a pyramid shape or arrange them horizontally across the shelf, so they make a line of interesting shapes and sizes.
11. Store Spices in Jars or Canisters
If you have a lot of spices to store in your pantry, consider using small jars or other decorative containers to keep them all together.
You can then place them on top of the shelf to be visible when needed but don’t take up too much space.
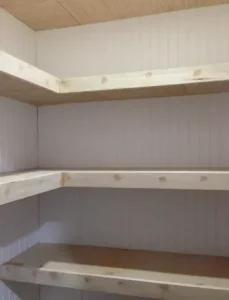
How to Build Corner Pantry Shelves
Building corner pantry shelves is a great way to maximize the space in your kitchen. Whether you are looking for an easy way to add storage to your kitchen or want to give your pantry some extra character, building corner pantry shelves is a great option.

The first step in building corner pantry shelves is choosing what type of wood you want to use.
You can use pine or fir lumber if you are not concerned about placing a lot of weight on the shelves.
If you have a heavier cabinet or appliance, choose a harder wood such as oak or maple. Next, measure the width and depth of each corner.
Use these measurements and the width and depth of each shelf to determine how many pieces of wood need to be cut for each corner.
These pieces will be used for mounting the hardware on them later on.
Now that all of your pieces have been cut out and sanded down, it’s time to start putting them together!
Lay out all of your pieces in their designated areas to line up perfectly with each other; this will make it easier when you start screwing everything together with screws or nails.
Once everything has been laid out properly, begin attaching the hardware onto each piece by using screws or nails through holes drilled into.

As a homeowner, I am specifically keen on home improvement. I am passionate about homes, yards, and home improvement. I blog on home ideas and reviews on solutions that make homes better.