Painting a sink can be a transformative and cost-effective way to revitalize your bathroom or kitchen without needing expensive replacements. Whether you want to update the look of a worn-out sink or inject a fresh pop of color, painting provides many benefits.
Firstly, it allows for customization, matching your sink to your existing decor or creating a unique focal point.
Secondly, it is a budget-friendly alternative to purchasing a new sink, saving you money while achieving a similar effect. However, before diving into this DIY project, it’s essential to consider certain factors to ensure a successful and long-lasting finish.
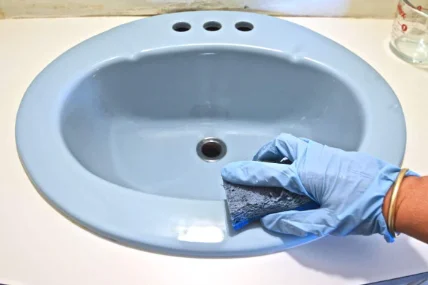
Step 1: Preparing the Sink
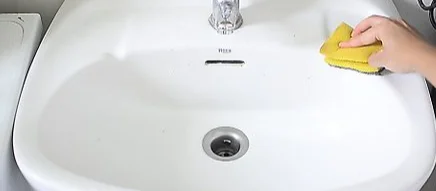
- Scrub the sink well to remove dirt, grime, or soap residue. Use a sponge or cloth and a non-abrasive cleanser to achieve a clean surface.
- After giving the sink a thorough rinse, let it air dry entirely.
- Any existing coatings or finishes, such as enamel or gloss, must be removed from the sink to ensure the new paint adheres properly.
- Sand the previous finish off with fine-grit paper or a paint stripper to remove it slowly.
- Wear safety gloves and eye protection, and adhere to the manufacturer’s guidelines.
- Sand the sink lightly once removed to give it a slightly rough feel. This will improve paint adhesion. Sand the entire surface, including the edges and corners, using fine-grit sandpaper. Dust should be removed using a clean, wet cloth.
- Use a top-notch primer created just for sinks. Apply a uniform coating to the whole sink surface using a brush or foam roller. The primer will give the paint a smooth foundation and increase its endurance. Per the manufacturer’s directions, let the primer dry.
- Choose a paint for sinks that can tolerate dampness, water, and regular use. Look for high-traffic area-specific epoxy or acrylic-based paints. Pick a hue that goes well with the kitchen or bathroom design. Use a brush or foam roller to apply the paint in thin, even coats, letting each coat completely dry before moving on to the next.
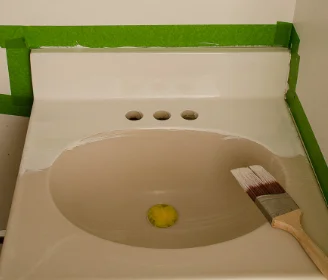
Step 2: Masking and Protecting the Surrounding Area
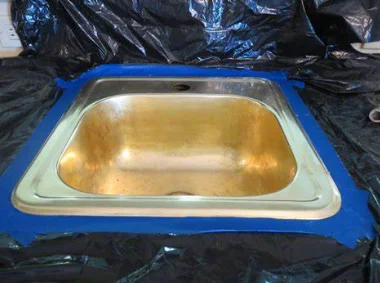
- Gather the necessary supplies for masking, including painter’s tape, plastic sheets, newspapers, and a drop cloth.
- Start by masking the surrounding countertop and cabinets to prevent accidental paint splatters or drips.
- Use painter’s tape to secure plastic sheets or newspapers along the edges of the countertop, ensuring they cover the entire area.
- Carefully tape the edges of the plastic sheets or newspapers to the countertop and cabinets, ensuring they are secure and won’t move quickly during the painting process.
- If a faucet is in the sink, protect it from paint by wrapping it with painter’s tape. Cover the entire faucet, including the handles and spout, to ensure no paint gets on them.
- You can either remove the drain temporarily or protect it with painter’s tape and plastic wrap. If you choose to protect it, wrap painter’s tape around the edges of the drain to create a barrier. Cover the drain with plastic wrap and secure it with more painter’s tape, ensuring it is tightly sealed.
- Place a drop cloth or an old sheet on the floor beneath the sink to catch any paint drips or spills. This will protect the floor from potential damage.
- Double-check all the taped areas and make sure everything is securely covered and protected. Take the time to smooth out any wrinkles in the plastic sheets or newspapers to create a tight seal.
Step 3: Applying the Base Coat
- For your sink, pick an acceptable foundation color. Choose a hue that complements the overall color scheme of your kitchen or bathroom. The best option is to choose a paint designed especially for use on sinks or other surfaces exposed to dampness and water.
- Use a paint stirrer or a wooden stick to fully stir the paint before applying it. This guarantees proper mixing of the color pigments, which leads to an even application.
- Apply the base coat to the sink’s surface using a good brush or foam roller. Moving across the canvas with even, fluid strokes, beginning at one end. To guarantee comprehensive covering, pay close attention to the edges and corners.
- Instead of using thick coats, apply the paint in small layers. This enhances adhesion and lessens the possibility of drips or uneven drying. Apply a second or third layer after the manufacturer’s recommended drying period.
- Allow enough time for drying between each coat. The type of paint and the surrounding environment can affect this time. For the recommended drying time, according to the directions provided by the paint manufacturer. To create a seamless and long-lasting finish, patience is imperative, and refrains from hurrying the procedure.
- Maintain good ventilation in the space. To encourage airflow and speed up drying during the drying time. The sink shouldn’t be used or exposed to water until the base coat is dry.
Step 4: Adding Decorative Elements
- Pick a decorative pattern or design that matches your aesthetic choices and harmonizes with the overall design of your kitchen or bathroom.
- Think about abstract designs, floral motifs, or geometric shapes.
- Consider utilizing stencils for complicated patterns. Choose a matching stencil, then stick it to the painted sink top with painter’s tape.
- Apply paint over the stencil with a small brush or sponge, ensuring clear, even lines. Before removing the stencil, let the paint completely dry.
- Apply painter’s tape in the places where you wish to create limits or separations for crisp edges and clear lines. This method works great when adding several colors or portions to your sink. Once the paint is dry, carefully remove the tape to prevent smudging by pressing firmly to ensure it sticks.
- To add texture or a false finish, consider using methods like stippling, ragging, or sponging. To add fascinating patterns or textures to the painted surface, use a natural sea sponge, a rag, or a textured roller. To attain the desired appearance, try out various methods and hues.
- Let the decorative pieces thoroughly dry before moving on to the following stage. To preserve the longevity of your design, adhere to the drying time recommendations given by the paint manufacturer.
Step 5: Applying a Top Coat
- Choose a tough top coat that is waterproof and made especially for use on sinks or other surfaces exposed to water and moisture.
- Choose a top coat that protects against blemishes, scratches, and fading.
- Choose a glossy or matte finish to achieve the style you like.
- Use a paint stirrer or a wooden stick to gently swirl the top coat before applying it.
- To reduce the entry of air bubbles into the top coat, avoid aggressive stirring.
- Apply the top coat with a fresh brush or foam roller to the painted sink surface. With even coverage, begin at one end and work your way across. Apply the top coat in thin, even layers, waiting the necessary amount of time between coats as instructed by the manufacturer.
- Pay close attention to the sink’s edges and corners to guarantee comprehensive coverage and protection. To create a uniform finish, smear off drips or extra top coat.
- Follow the manufacturer’s recommendations and let the top coat thoroughly dry. To speed up the drying process, ensure the location has adequate airflow.
- Check the sink for flaws or uneven surfaces once the top coat has dried. To get a smooth and faultless finish, softly sand the surface with fine-grit sandpaper if necessary.
Step 6: Curing and Drying
- Recognize that drying and curing are two distinct processes. Curing refers to the chemical processes that harden and preserve the paint, whereas drying refers to the evaporation of water or solvents. Refer to the manufacturer’s instructions to determine the precise drying time needed for the paint used on your sink.
- Before applying the top coat and after each coat of paint, give the surfaces enough time to dry. This minimizes the possibility of smearing or harming the earlier layers and ensures that each layer has dried completely.
- Avoid using the sink while the paint is curing and drying to avoid unintentional damage or interruptions. The curing process can be hampered, and the finished product is affected by water exposure or pressure.
- For the best results, adhere to the manufacturer’s suggested curing and drying timeframes. Before resuming normal sink usage, be patient and give the paint enough time to cure and solidify.
Step 7: Finishing Touches
- Masking tape and protective coverings on the counter, cabinets, and faucet should be carefully removed.
- Spend some time making sure the painted surface will be removed cleanly.
- Check the painted sink for any potential touch-up spots. Look for any overlooked areas, uneven coverage, or flaws. Touch up these spots with a little brush and matching paint and blend them in with the surrounding surface.
- Any spills or drips on the sink or nearby should be cleaned up. Wipe away any extra paint or residue using a moist cloth or sponge. When cleaning, take care not to disrupt the painted surface.
- Reinstall the drain and faucet, if necessary, when the paint has fully dried and hardened. To ensure a safe and reliable setup, follow the manufacturer’s instructions for correct installation.
Step 8: Maintenance and Care
- When cleaning a painted sink, use gentle and non-abrasive techniques to protect the paint. Avoid using abrasive cleaners, scrub brushes, or scouring pads that can scratch or damage the painted surface.
- Opt for mild, non-abrasive cleaners formulated explicitly for painted surfaces. Dilute the cleaner in warm water and gently use a soft sponge or cloth to clean the sink. Rinse thoroughly with water afterward.
- Avoid harsh chemicals, such as bleach or ammonia-based cleaners, as they can fade or strip the paint. Stick to gentle and pH-neutral cleaners to maintain the integrity of the painted surface.
- Regularly inspect the painted sink for any signs of wear or damage. Look for chips, peeling, or discoloration. If you notice any issues, promptly address them to prevent further damage. Touch any small areas using the original application’s paint color and technique.
- As part of routine maintenance, wipe the sink dry after each use to prevent water spots or mineral buildup. This helps maintain the appearance and durability of the painted surface.
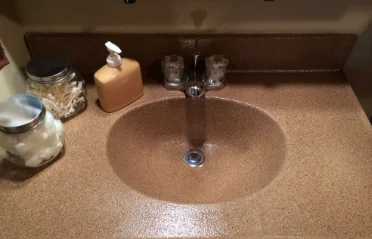
Conclusion
Painting your kitchen sink can significantly improve the look and feel of your room. You may create a unique and modern kitchen setting by picking the appropriate colors, using high-quality paint, and using suitable procedures.
Beyond just being aesthetically pleasing, painting a sink may also save you money by allowing you to modernize your kitchen without having to replace it.
The ability to alter the color and pattern of the sink gives it a special touch that represents your taste.
Take advantage of the chance to remodel your kitchen and make it a more pleasant, useful, and personal area. You can experience a new sense of pride and fulfillment in your kitchen with a painted sink.
Frequently Asked Questions
Can any sink be painted?
The majority of sinks can generally be painted. However, it is crucial to consider the sink’s material and select the proper paint and preparation methods.
Some materials, like porcelain or ceramic, may need particular products or treatments for successful painting.
How long does the painted finish last?
Several elements, including the paint’s quality, how well it was applied, how often it was maintained, and how it was used, might affect how long a painted sink’s finish lasts.
It can survive for many years with proper maintenance.
Can I paint a stainless steel sink?
Painting a stainless steel sink is not recommended, as the smooth and non-porous surface of stainless steel makes it challenging for the paint to adhere properly and maintain a durable finish.
Is it necessary to sand the sink before painting?
The sink should be sanded before painting to help produce a somewhat rough surface for improved paint application. But it can rely on the precise guidelines the paint’s producer offers.
Can I repaint my sink if I don't like the color?
If you don’t like the color of your sink, you can paint it again.
To get the desired effect, remove the old paint or primer, sand the surface, and apply a fresh coat in the chosen hue with the necessary preparation and paint supplies.

I love writing about solutions on issues that I face at home and around the community. I love to share creative ideas and valuable reviews of some of the best products to make your home experience better.