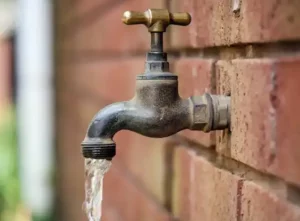
Outdoor faucets are devices used to control the flow of water outside the house. These faucets are mostly connected to garden hoses.
They have functions similar to indoor faucets but they don’t work in similar ways. Outdoor faucets supply water for landscaping and other outdoor uses and have a simpler mechanism than indoor faucets.
This is mainly due to facts such as hot water not being needed much outside. Outdoor faucets also have to cope with weather conditions without corroding or freezing, unlike indoor faucets. Therefore, most outdoor faucets are made of rust-free materials.
Outdoor Faucet Too Low to the Ground
When an outdoor faucet is positioned close to the ground, it is very difficult to access it. Therefore, for easy access, it should be raised.
To add to that, when faucets are placed low on the ground, water pressure increases.
If you need the pressure of the water to decrease, then you will have to raise the faucet higher from the ground and within easy reach.
To do this you will need to follow this process:
- Close the main shut-off valve that supplies water to the faucet. Then open the faucet to drain the water left from the pipe.
- Saw the faucet off the pipe that extends to the wall using a hacksaw
- To provide a better surface for welding clean the outside of the pipe with a cloth until it shines.
- Determine the fitting required to raise the faucet. If the pipe comes directly at the wall you will need a 90-degree elbow to raise it while if the pipe comes from the floor, you will need a coupling.
- To the end of the fitting and the pipe apply a thin layer of flux and place the fitting on the copper pipe
- Heat the center of the fitting using a propane torch. When the fitting is heated place a soldering metal on the gap where the fitting meets the pipe. The solder will be absorbed into the heated fitting soldering it in place
- Using a hacksaw cut the pipe to the height you want the faucet to be. Clean the end of the pipe and solder it to the end of the fitting.
- Clean the other end of the pipe and apply a small amount of flux on it and the faucet. Place the faucet into the pipe and solder it in place. The faucet will take longer to heat up. Therefore, the soldering process may take longer than expected for it to solder properly.
- Turn on the water supply and check for any leaks, especially on the soldered parts. If no leaks are noticed, you are good to go. If you notice leaks, turn off the water and solder the leaking points properly.
See our guide on the best outdoor kitchen sinks with cover.
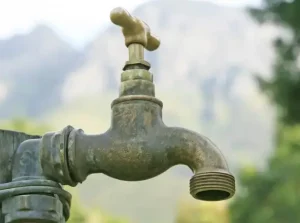
Outdoor faucet too big for hose
The outdoor faucet is too big for the hose if the hose is smaller and cannot fit into the faucet. For example, ¾ inch faucets are too big to connect to ½ inch hoses.
To avoid this, you can always ensure that you purchase horses that are the same size as your faucet. Garden hoses are not universal.
They come in different sizes to give you options and ensure your faucet and hose fit together. However, if you have purchased a hose that is smaller than the faucet you can use an adapter to connect the two.
Taking the example above, if you have ¾ inch faucet and a ½ inch hose, you can use an adapter that is screwed to the tap to reduce it to ½ inch.
The adapter converts your garden faucet into the thread needed to connect to your hose fitting. To install the adapter, follow this process.
- Unscrew the tip of the faucet and remove it carefully.
- Screw the female end of the adapter which has threads housed inside the faucet. Make sure that a tight seal is formed without overtightening the adapter.
- On the other end connect the hose.
- But before connecting, ensure that the small rubber gasket inside the garden hose is still in place. If it is not in place the connection will not be secure.
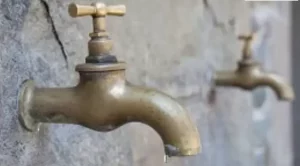
Outdoor faucet too hard to turn
Outdoor faucets become too hard to turn due to a build-up of minerals deposits and problems related to the cartridge.
Also, overtightening the faucets will make its valve hard to turn. Several tips can be used to loosen a hard-to-turn faucet. These include:
1. Using the right tools
To loosen hard nuts you will need an adjustable wrench, plumbers grease, tongue and groove pliers, and screwdrivers.
2. Cleaning and replacing the parts of the faucet
Debris that makes faucets hard to turn can be cleaned using vinegar and a scrub brush. The threads should then be lubricated using grease.
If the faucet needs replacing, make sure that you purchase the same brand and type of faucet for them to fit properly and prevent turning problems.
The following is the process used to turn a faucet:
- First, turn it with a wrench. This is if you can’t turn the faucet using your bare hands. To do it place the wrench to hold the faucet nut in place and turn it anti-clockwise.
- Secondly, if the faucet did not turn you can use the hairdryer to heat it. The heat from the hairdryer will help loosen the rust and break down corrosion on the faucet. Once you heat the faucet try to turn it before it cools down.
- Thirdly, if the above does not work you can use a wire brush to remove some corrosion that has already loosened on the faucet. Once the excess corrosion is removed turning the faucet should be easier.
- Fourthly, if the wire brush doesn’t succeed in the task, use the plumbers’ grease. This grease should penetrate the faucet and force the corrosion that is making turning the faucet hard out. After applying the grease leave it for four to five hours before trying to turn it. Repeat the process severally if the previous attempt becomes unsuccessful.
- Lastly is to soak the faucet in vinegar which is a natural cleaner that eradicates corrosion. Vinegar should be applied and left on the faucet overnight. To do this soak a rag in vinegar and tie it around the corroded faucet part and leave it there overnight. The next day brush the faucet using the wire brush and try opening it. If the faucet is still not opening mix the vinegar with bicarbonate of soda and repeat the overnight soaking process.
Outdoor Faucet Too Close to the Wall
Outdoor faucets are installed closer to the war to prevent them from injuring people and prevent them from damage when using gardening equipment such as the lawn.
However, faucets that are very closer to the wall are not easily accessible.
To maintain a wall faucet, drain them. This is especially during winter to prevent clogging.
To add to that, the inside of the valve has to be kept uncovered. Covering it will insulate it and prevent warm air from circulating within the valve.
Without the warm air, the piping can easily freeze and burst. Also, make sure that the garden hose is removed from the faucet.
Water in these pipes can freeze during winter and expand into the valve and damage it. To fix your outdoor faucet to the wall you will need to do the following:
- Choose a location where you will install the outdoor faucet that will be near the wall. The location must provide a convenient water supply.
- Drill a hole that is larger than the faucet tailpiece diameter in the exterior wall. Hold that drill at an angle so that the hole will tilt down to the outside approximately at ¼ inch so that water drains out when turned off.
- Before installing the outdoor faucet wrap three turns of plumber’s sealing tape around the tailpiece of the faucet. Thread the female pipe to the adapter and hold the faucet with an adjustable wrench as you use another wrench to tighten the adapter.
- Around the back of the faucet flange, apply a bead of silicone caulk. With the spout pointed downward, slip the faucet into the hole and provide an even mounting surface using a shim. Attach the flange to the wall with screws. Drill pilot holes and on the masonry wall screw anchors. To avoid damaging the seals during soldering remove the valve stem from the faucet and loosen the faucet packing nut.
- Next, the tee fitting should be held up to the water supply line. Leave enough pipe on both ends when making the two marks on the pipe for cut lines so that both ends penetrate the tee at ¾ inch.
- Turn off the water supply and place a bucket beneath the pipes to catch leaks. Cut the pipe at the marks made. Test if the tee fits and leave it there temporarily to measure the distance between the tee fitting and the adapter threaded on the faucet tailpiece. Use the measurement to cut a pipe that fits between the tee and the adapter and test it to ensure smooth assembly
- Remove the piece of pipe and tee and clean the outside of all ends of the pipe together with the inside of the tee fitting and adapter. Apply soldering flux on the ends of the pipe and the inside of the fitting adapter. Make sure the pipe ends insert properly into the fittings as you assemble the pieces
- Use the propane torch to apply heat and solder each connection. Wipe the joints to remove excess flux.
- Before reinstalling the valve stem into the faucet allow the assembly to cook. Turn on the water supply and check for leaks.

As a homeowner, I am specifically keen on home improvement. I am passionate about homes, yards, and home improvement. I blog on home ideas and reviews on solutions that make homes better.