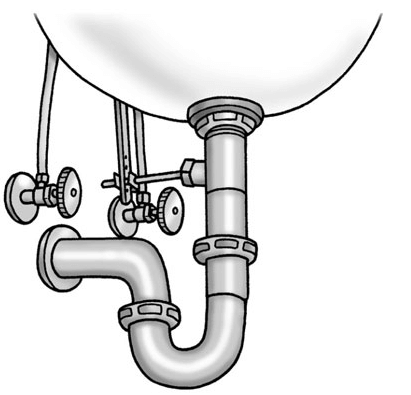
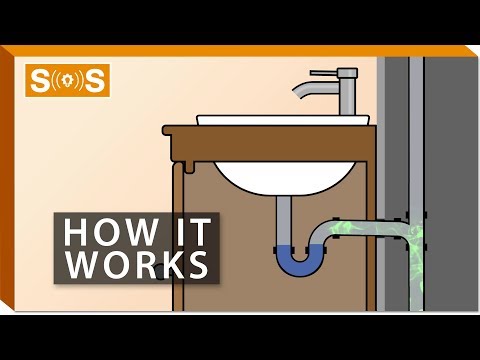
The p-trap is a U-shaped pipe that retains water to prevent sewer gases from entering your kitchen. The p-trap is connected with the pipe that leaves the sink and the other to the wall drain pipe.
The following steps can be followed to connect the p-trap to the wall drain:
Also Read: 10 ways how to Remove hard water Stains from Porce
How to Connect a P-trap to a Wall Drain?
First, slide the p-trap’s short side into the tailpiece that drops down to the sink drain. Align to the opening on the wall the trap arm by moving it up or down.
If the trap arm is below the wall drain fitting, and you cannot move the p-trap higher up the tailpiece, use a hacksaw to cut the tailpiece. If when attached to the end of the tailpiece the p-trap lies above the wall drain, then purchase a longer tailpiece.
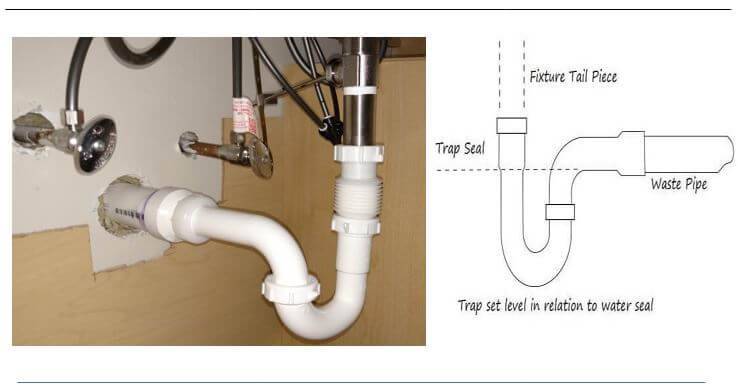
The trap should be installed directly under the drain so that one can verify whether or not it is holding water or has been damaged.
Water gravity that forces water out is also greater when the trap is directly under the drain.
The trap arm connecting the vent pipe horizontally from the p-trap must have ¼ inch per foot slope sloping up towards the drain.
Take apart the lower part of the p-trap and then insert the trap arm into the wall drain fitting as far as it will go.
Start pulling out the trap arm from the wall fitting to the point where it will exactly fit with the top U-shaped portion of the trap.
You will need to purchase another p-trap if the trap arm comes out completely from the wall before getting attached to the trap.
You will need to cut the trap arm if it is in the wall fitting and still extends past the u-shaped part of the trap. Use a hacksaw to cut it to the appropriate length.
Insert back the trap arm into the wall drain. Align the trap arm back to the trap and thread on the slip nut without tightening it.
When you ensure that all the trap parts are joined together correctly you can now tighten the slip nuts on the wall drain fittings and the tailpiece.


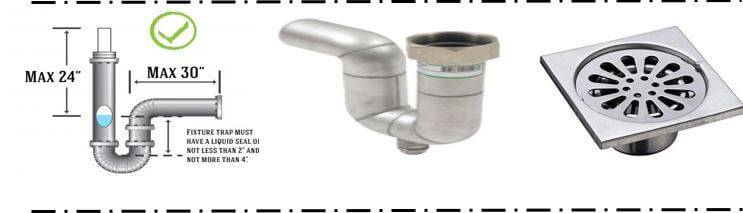
How to Install a P-trap into a Floor Drain?
A floor drain is a plumbing feature that is used installed on floors to help remove any standing water from the floor. They come in different shapes: round, square, and rectangular.
A floor drain should have a strainer. This is a feature secured over the drain to help avoid injury and entry of foreign objects in the drain.
Piping floor drains with p-traps is important because they create a water seal that enables easy drainage and prevents drain odors. P-traps allow dirt from the floor to accumulate fast and the drain can easily clog.
When buying a floor drain it is important to ensure you buy one that allows sand and dirt to settle out and not get carried away to the drainpipe. The following is the process through which a p-trap is installed in a floor drain but first are the requirements:
- A floor drain.
- A p-trap.
- Glue for pipes
- Pipes
- Coupling.
After locating and cutting a hole in the floor, install the drain on the floor. Screw the drain into place and make sure the extension fits through the hole and extends to the floor below.
Install an extender pipe to the drain assembly. To do this cut a section of the pipe and make sure you cut the pipe square.
Smear some glue on the inside side of the coupling. Smear more glue to the pipe that extends below the floor. Put the two pipes together and hold them firmly until the glue sets.
Now you can install the p-trap. First, identify the straight line that extends from the drainpipe you have put in place and the drainage system of the house. The two must eventually connect.
Couple the p-trap to the drain system of the house and the established drain pipe. The p-trap should follow the straight line. Now you can glue together the two sections of the p-trap and make sure that it points in a straight line of the eventual drain line.
Cut the end-point of the drainage pipe and install the pipe to the tee to finish the process.
Also Read: 12 best Bathtubs for Seniors & Walk-In Tubs for elderly shower
How to Connect Sink Drain to Wall Pipe?
To connect your sink drain to the wall pipe, the following process has to be completed:
Connect the tailpiece to your kitchen sink strainer. Align its threads to the threads of the kitchen sink strainer and tighten it up through clockwise motion.
Fix the tailpiece with a drainpipe. A rubber gasket should be inserted into the drainpipe to ensure a watertight seal after the drainpipe and tailpiece are connected.
Install the p-trap to connect the drain pipe from the sink drain to the wall pipe. Slide the short side of the p-trap onto the tailpiece rotate the p-trap to make sure that you align the trap arm with the wall drain fitting.
You can cat the p-trap using a hacksaw to adjust it if the arm is below the wall fitting and you can’t move it higher the drainage pipe. If the trap aligns properly insert it into the wall drain and line it up with the u-shaped portion of the trap.
Tighten the slip nuts on the wall drain if everything aligns perfectly to complete the process. If the wall drain is too far away from the sink, then you may need an extra pipe to connect your p-tap to the wall drain.
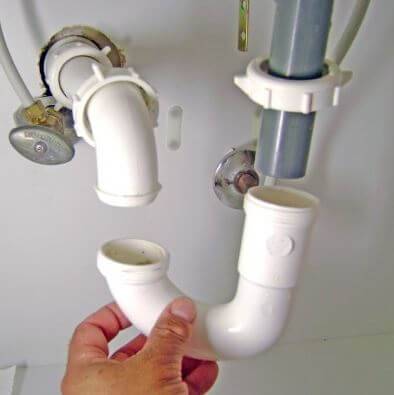
Alternatively, you can install drain pipes from the sink to the wall outlet. It is not a hard process and it can be done individually through the following process:
- The first step is to remove the clean-out plug which is located at the bottom of the p-trap. before removing it place a bucket under the p-trap to drain in the water. Leave the bucket in place if there is no clean-out plug.
- Try removing the nut that secures the p-trap drain extension that fits into the wall using your bare hands. If you are unable, use pliers to loosen the nut and remove it using your hand.
- Swivel the p-trap gently away from the drain extension allowing some of the water in the trap to flow into the bucket.
- Below the drain flange, find a nut and try removing it by hand. If it doesn’t loosen it a little bit and remove it using your hand.
- To prevent water from spilling on the cabinet floor allow the drain pipes to fall into the bucket.
- You should find the parts of the new drain pipe kit and separate them. lay them out one by one to ensure that every part you need is available.
- Secure the drain flange and the tailpiece immediately under the sink drain and tighten them using your hand.
- Connect the p-trap to the tailpiece and avoid tightening the nut to enable maneuvering of the p-trap into position to connect it to drain extension.
- Connect the p-trap to the drain extension and use hands to tighten it as well as the tailpiece nuts.
- Turn on the water and check for leaks and if there are none use pliers to tighten the nuts.
Check our guide on how to vent a kitchen sink drain to learn more about plumbing and solutions to common sink problems.
Also Read: Best stainless steel Kitchen sinks that don’t scratch: Resistant
A Guide to Connecting 1-1/4 Tailpiece to 1-1/2” Drain
To connect a 1-1/4 tailpiece to a 1-1/2 drain you will need to get a slip nut that measures 1-1/2 × 1-1/4 and a washer. This will fit both the sizes of the drain and tailpiece.
A 1-1/2 trap adapter can also be used on the pipe out of the wall. Adapters will help prevent water from leaking down from the main sewer line into the sink.
Metallic trap adapters are used in metallic pipes while plastic trap adapters are used in plastic pipes. The 1-1/2 metal trap adapter is inserted into the drain and tightened using stainless steel clamps that are on the adapter.
These adapters instantly create a sanitary seal that is leakproof. The 1-1-4 tailpiece can then be connected to the other side of the trap adapter.
For plastic traps, adapters glue will be needed to seal them to the drain. Make sure that the drainpipe is smooth and do a dry fit to confirm if the trap adapter fits perfectly.
Smear some glue on the outside of the drain and the inside of the adapter. Insert the adapter on the drain and hold it up until the glue reacts and sticks the two together.
Use a washer to insert the pipe from the tailpiece to the other end of the adapter. Read more about how to install joint washers in plumbing and sink pipe joints.

As a homeowner, I am specifically keen on home improvement. I am passionate about homes, yards, and home improvement. I blog on home ideas and reviews on solutions that make homes better.